'Draw the form' Page |
|
In the 'Draw the form' page you can visually design the form. You can place the form elements and arrange them in the way you want.
See Also: How to display elements conditionally
How to keep your form style consistent with your website style
Prefer File uploadbox rather than Native file upload
General design operations
Placing a form element on the formPress the button for the element in the right side to place an element of that type on the canvas. You can move and resize the element using the handles.
Updating the properties of an elementSelect the element. Right click on the element and choose 'properties' from the context menu. Alternatively, you can double-click on an element to open the properties dialog box.
Tab orderPressing the tab order button opens the Tab order dialog box where you can re-arrange the tab sequence ( The sequence in which the focus shifts from control to control when the 'tab' key is pressed ).
Find ElementPress the Find Button ('Standard' tab) to search for any element by name. See Find Element Dialog
Cut, Copy, Paste and DuplicateThe buttons for Cut, Copy and Paste are provided on the top side of the drawing page ('Duplicate' tab). The duplicate button can be used to quickly make duplicate copies of the selected elements.
Undo, RedoYou can undo the operations multiple levels by pressing the undo button. (Keyboard shortcut Ctrl+Z).The undone operation can be re-acted by pressing the redo button. The undo and redo buttons are in the 'Standard tab)
GridGrid enables better placement of the controls. Press the Grid button to enable grid. When the grid is enabled, the controls drawn on the form snaps to the grid while sizing and while moving.
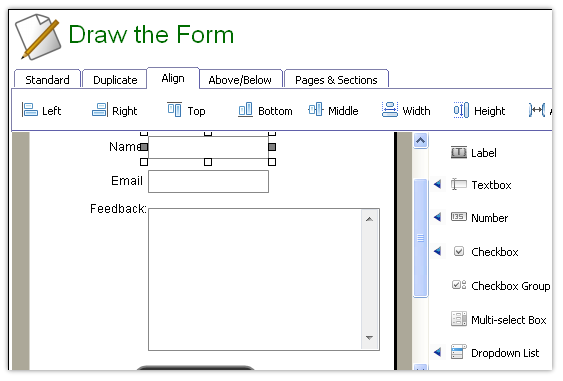
AlignThe Align buttons (Align left, right, top, middle or bottom) helps in arranging the elements. Select multiple elements and press one of the align buttons. This places the elements aligned to the selected side. There are buttons to make the size (width or height ) same as well.
The align operations tries to align with the First selected element in the group.
Above/Below
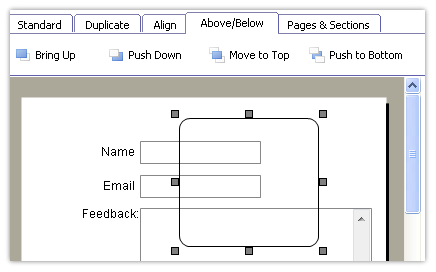
The elements placed on the form can overlap each other. The element above is higher in the z-order (being up in the z axis ). When you want to bring an element to the top, press the 'Move to top' button.
For input elements, it is important that no other element overlaps the input element. The input element overlapped by another element can not be selected or edited in the online form. This can cause potential confusion.
When you want to use an image in the background, do 'Push to Bottom' .
Input ElementsThis group of buttons lets you add input elements to the form.
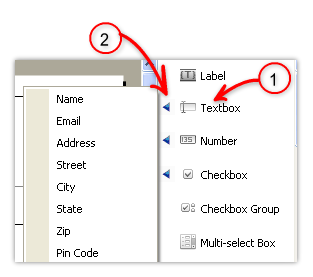
Press the tool button (1) to place a new element on the form.
The small-quick-button (2) just to the right of the Input element buttons is to add frequently required input elements (for example, Name, Email or Address)
Pages and SectionsThe Pages & Sections tab contains controls to add/delete/modify the form pages.
Form sections can be used to hold conditional parts of the form that can be shown/hidden based on conditions (see How to display elements conditionally ). Press the new section button to add a new form section.
See also: Page Settings Dialog Box
|


