|
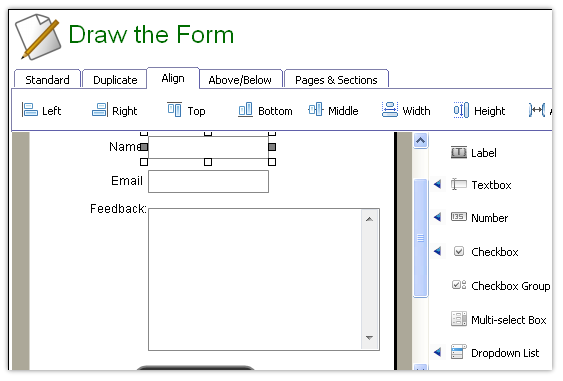
The 'Draw the form' page is for adding input elements to your form.
 Draw the form page
First, we will add the 'Name' field.
Add the 'Name' field
- Press the 'Textbox' button. A text box is added to the form.
- Place the text box by dragging it.
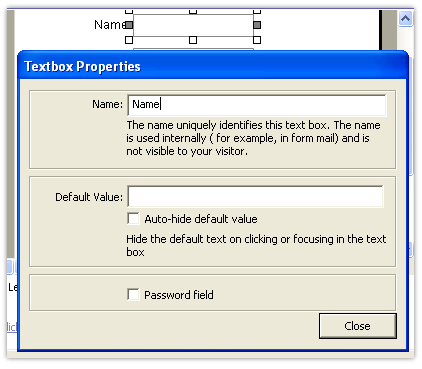
- Double click on the text box to open the properties box for the Textbox.
- Change the name of the field to 'Name'.

- Press the 'Label' button and place the label next to the 'Name' Text box.
- Open the properties box for the label by double-clicking it.
- Change the label text to 'Name'
Add an 'Email' field
- Add a Textbox for the email field just like we added the 'Name' field. (With name and label as 'Email')
Add a 'Feedback' field
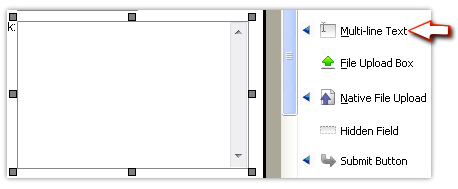
- To add a 'Feedback' field, press the 'Multi-line' Text button. A multi-line text box object is placed on the form.
- Double-click on the multi-line text box and change its name to 'Feedback'
- Add a label for the 'feedback' field and change it's label text to 'feedback'

 For 'Name' and 'Email' we chose 'single line' Textbox where as for feedback we expect multi-line input. Thus we added a multi-line box. For 'Name' and 'Email' we chose 'single line' Textbox where as for feedback we expect multi-line input. Thus we added a multi-line box.
Now we have all the elements required for the form ready.
No; oops! We did not add a 'Submit' button!
Add a submit button
Press the button labelled 'Submit button'.
A submit button is placed on the form.
Let' have a 'Preview'
Click on the preview button to have a quick look at your form.

 Element Properties Element Properties
Select an element from the form, right click it and choose 'properties' from the context menu.
Alternatively, select an element from the form, and press Ctrl+Enter to open properties of an element.
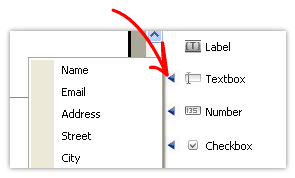
 Quick sets Quick sets
The right arrow buttons next to the input elements are for quickly adding commonly used input elements.

Prev: Let's Plan a Simple Form | Next: Add Validations
| 


