Step 3: Add Validations

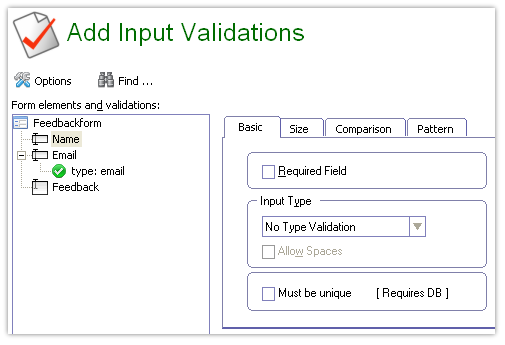
This page is to add input validations- checks to ensure that the data input is valid. In the 'Add Input Validations' page, the left side tree displays all the input elements. Select an element  from the left; the validations for the selected element appears to the right.


Input validations


Add validations to the 'Name' field

  • Select the 'Name' field from the left side box.
  • We will make the 'Name' field mandatory. Select the 'Required Field' check box
  • Now select the 'size' tab. Select the 'Max Length' check box and provide a maximum value( 40 or 50 ?)


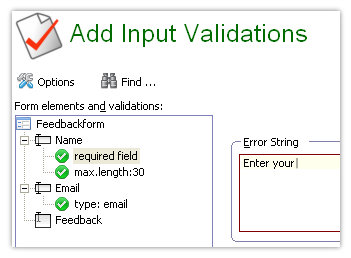
Notice the validation nodes appearing on the left-side tree.


  • Select the 'required field' node from the left-side tree.
  • On the right side you will see the error message for this validation (the error displayed if this validation fails). You can customize the error message

Edit validation error message

Validations for the 'Email' field

  • Select the 'Email' node from the left side box.
  • On the right side, select the 'Required Field' check box, making it a mandatory field
  • From the 'Input type' drop down, select 'Email' type

Validations for the 'Feedback' field

We will set a maximum length limit for the feed back field.

  • Select the 'Feedback' field from the left side
  • Select the 'Maximum Length' check box and enter the Max. limit ( say 10240, ie 10 KB?)

Now, we are ready with the input validations.


Save your work

You can, at any point, save your work to a 'Simfatic Forms project' file. (The file extension is fwz)

  • Click on the Save button from the toolbar
  • The file dialog pops up. Select the file location and the file name.

Press the Next button to move to the next step.


Prev: Add Input Elements | Next: Select Form Processing Options